Are you planning to go for a complete un-installation of QuickBooks Desktop software to fix any technical snag in the software? You can ensure that by using the Clean Install tool. It is a holistic tool that cleans all the QB files from your system.
The Clean install tool is a valuable tool in the QuickBooks Desktop software that can assist you in repairing broken functions associated with QuickBooks. This article shall familiarize you with the various ways of cleaning the QuickBooks Desktop by taking the aid of the Clean Install tool. To use the QuickBooks clean install tool, you must follow the walkthrough given below. To complete the work, follow the exact instructions outlined below.
Steps to Use the QuickBooks Clean Install Tool
To use the QuickBooks Clean install tool, you need to perform the below-mentioned steps:
Step 1: Uninstall QuickBooks Desktop
- Open the ‘Run’ window by pressing the ‘Win + R’ keys together.
- When the Run window appears, type ‘Control Panel’ and hit ‘Enter.’
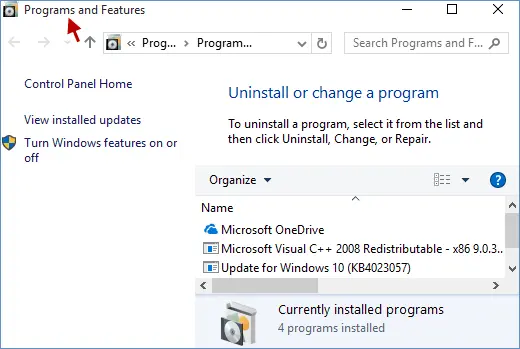
- Go to ‘Programs and Features’ once you’re in the ‘Control Panel.’
- Select ‘Uninstall a Program’ after that.

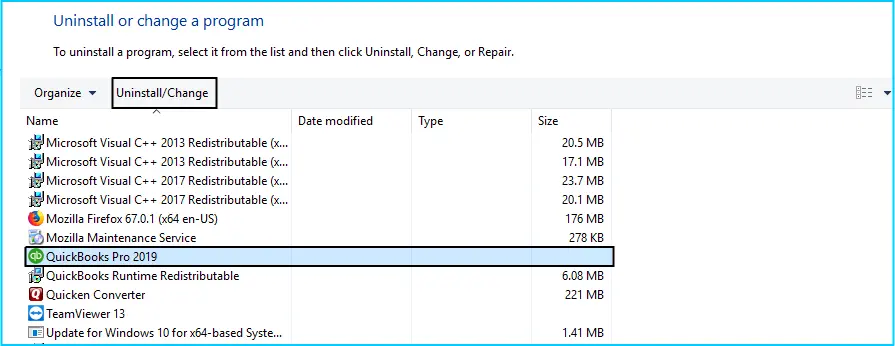
- From the list of installed apps, look for QuickBooks and choose it.
- To complete the uninstalling procedure, select the ‘Uninstall/Change’ option and then ‘Uninstall.’

- To completely delete QuickBooks Desktop from Windows, follow the steps that show on the screen.
Step 2: Rename the QuickBooks Installation Folders to Uninstall the QuickBooks software
- First, ensure that the ‘Display Hidden Files and Folders‘ option is enabled in Windows.
- By pressing the ‘Win + E,‘ access the Windows File Manager.
- Go to the following location to find the QuickBooks installation folder:
- C:\ ProgramData\ Intuit\ QuickBooks
- 64-bit version C:\Program Files (x86)\Intuit\QuickBooks
- C:\Users\(current user)\AppData\Local\Intuit\QuickBooks
- C:\Program Files\Intuit\QuickBooks
- Right-click the QuickBooks folder and choose ‘Rename’ from the menu.
- Reinstall QuickBooks after adding ‘.OLD’ at the end of the folder name.
Method to fix any error while renaming the QuickBooks Folder
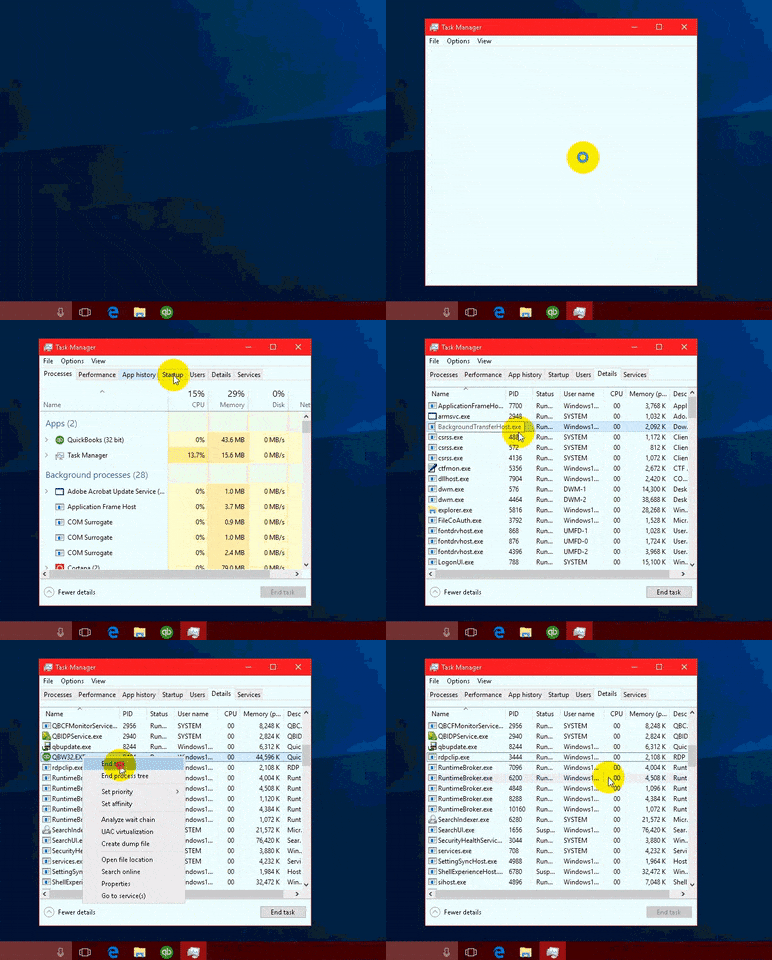
- Right-click the Window Task Bar or press ‘Ctrl + Alt + Delete’ keys together and choose ‘Task Manager.’
- Under the ‘Process’ tab, select the ‘Image Name column header’ to sort processes alphabetically.
- Right-click ‘QBDBMgrN.exe’, ‘QBDBMgr.exe’, ‘QBCFMonitorService.exe‘, ‘Qbw32.exe’, files then select the ‘End Process‘.

- Click ‘OK’ on the warning message on the screen.
- Rename the QuickBooks folder once again.
Step 3: Download & Run the QuickBooks Clean Install Tool
- To begin, download the ‘QuickBooks Tools Hub’ and save the file.
- Now launch the QuickBooks Tools Hub from the downloads folder and complete the installation by following the on-screen directions.
- Select the ‘I accept‘ option from the license agreement to culminate the installation process.
- From your computer’s desktop, choose the QuickBooks Tools Hub icon.
- After selecting ‘Installation Issues.’, choose ‘Clean Install Tool.’

- Choose ‘QuickBooks Desktop‘ and select ‘Next.’
- Click on ‘OK’ when a message prompting you to install your copy of QuickBooks to the default location shows up on the screen.
- Once the Clean Install Tool successfully removed QuickBooks from your system, go for a fresh installation of QuickBooks.

Step 4: Reinstall QuickBooks Desktop
Below are the steps that can help you to reinstall the application using QuickBooks clean install tool:
- Using the QuickBooks clean install tool, rename the ‘QuickBooks Desktop Installation folders‘ and ‘folder location.‘
- Continue to the final step when you’ve finished renaming the installation directories.
- In the final step, reinstall the QuickBooks software.
The instructions provided in this article must have assisted you in taking the aid of the clean install tool to uninstall and reinstall the QuickBooks Desktop software in your system. You may contact our QuickBooks enterprise support team for additional assistance pertaining to the tool.
Furthermore, if you have any accounting related queries, you may contact us at 1-800-761-1787 anytime as our customer support services are available 24/7.


