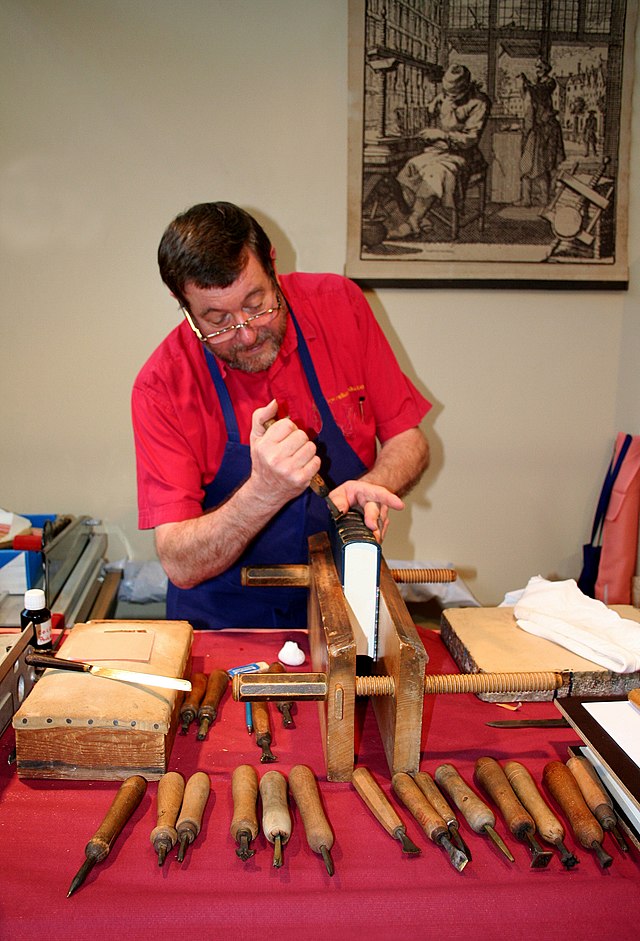
Hand binding, a timeless craft, involves creating or restoring books by hand using various techniques and tools. This skill is not only practical but also allows book lovers, artists, and crafters to personalize their projects. If you’re new to hand binding or looking to refine your skills, this guide covers the basics, essential tools, techniques, and more. Read more to discover the art of hand binding and how to get started on your first project.
What is Hand Binding?
Hand binding is the process of assembling and binding pages together to form a book manually, rather than using automated machinery. This method often involves folding pages, sewing them into sections (also called signatures), and attaching them to a cover. It’s a craft that goes back centuries and is still cherished by those who value handmade, personalized items.
Why Choose Hand Binding?
Hand binding offers several advantages:
- Personalization: Customize the size, cover, and materials.
- Quality Control: Ensures durability and attention to detail.
- Creative Expression: Allows artistic touches through decorative elements.
Moreover, hand-binding lets you upcycle materials or create new journals, sketchbooks, or gifts.
Essential Tools for Hand Binding
To start hand binding, you’ll need a few essential tools. Investing in good-quality materials makes a big difference in the outcome.
- Needles and Thread: Use curved or straight needles, and opt for durable, waxed thread.
- Awl: A pointed tool that helps punch holes for stitching.
- Bone Folder: Smooths out paper folds without tearing the material.
- Cutting Tools: Precision knives and cutting mats ensure neat edges.
- Glue and Brushes: PVA glue is commonly used for binding, and brushes help with precise application.
- Binding Clips: Hold pages in place while you work.
Additional Materials
Depending on your project, you may also need book cloth, endpapers, decorative paper, or leather for the cover.
Basic Hand Binding Techniques
There are several techniques to explore in hand binding. Here are some popular ones to consider:
1. Coptic Stitch Binding
Coptic stitch binding is a popular technique that leaves the spine visible. It’s ideal for creating lay-flat books, like journals or sketchbooks. In Coptic binding, the pages are sewn together in a chain stitch, and each section is added one by one.
2. Japanese Stab Binding
Japanese stab binding, known for its decorative stitches, is another beautiful method. It involves punching holes along one edge of the book and weaving thread in various patterns. This method is suitable for binding loose sheets rather than folded signatures.
3. Perfect Binding
Perfect binding uses glue to attach pages directly to the cover, creating a professional-looking result. This technique is often used for paperback books and notebooks. However, it’s less durable than sewn methods.
4. Case Binding
Case binding is a hardcover bookbinding technique where signatures are sewn together and attached to a cloth or leather cover. This method is durable and commonly used for creating hardcover books.
Step-by-Step Guide to Coptic Stitch Binding
One of the most popular hand-binding techniques, Coptic stitching, is easy to learn and produces a beautiful result. Follow these steps to try it yourself:
- Gather Materials: Prepare your paper, cover materials, thread, and binding tools.
- Prepare Signatures: Fold your paper into signatures (groupings of pages) and stack them.
- Punch Holes: Use an awl to punch holes along the spine of each signature and the covers.
- Start Stitching: Begin sewing from the bottom hole of one signature, creating a chain stitch as you move up.
- Add Signatures: Continue sewing through each signature, attaching it to the previous one.
- Secure the Cover: Attach the front and back covers as you finish the stitching.
Once completed, you’ll have a beautiful handmade book that lies flat when open.
Tips for Successful Hand Binding
Here are some tips to help you succeed in hand binding:
- Choose Quality Materials: Invest in quality paper, thread, and cover materials for durability.
- Practice Patience: Hand binding can be time-consuming, so work slowly and enjoy the process.
- Experiment with Styles: Don’t be afraid to try different binding methods to find what you enjoy most.
- Use Protective Surfaces: Protect your workspace with a cutting mat and avoid gluing near your main pages.
Advanced Hand Binding: Adding Decorative Touches
Once you’re comfortable with the basics, you can add decorative elements to your hand-bound books:
- Decorative Papers: Use marbled or handmade papers for covers or endpapers.
- Embossing: Stamp designs on leather or cloth covers for a professional look.
- Bookplates and Bookmarks: Add personalized bookplates or ribbon bookmarks to enhance the user experience.
Benefits of Learning Hand Binding
Hand binding is not only a useful skill but also an enjoyable creative outlet. It fosters a connection to traditional crafts and promotes mindfulness. Plus, the books you create can be cherished keepsakes or meaningful gifts.
The Eco-Friendly Angle
Hand binding can be an eco-friendly hobby. Using recycled or upcycled materials reduces waste and allows you to give new life to old books or papers.
Getting Started with Hand Binding
The best way to learn hand binding is to start with a simple project, like a small notebook or journal. Gather your materials, choose a binding style, and begin experimenting. Over time, you’ll build confidence and be able to create more complex projects. Read more about advanced techniques and tools to further your skills in hand binding, and discover the joy of making custom books by hand.
Conclusion
Hand binding is a rewarding craft that combines practicality and artistry. With the right tools and techniques, you can create beautiful, personalized books that showcase your creativity. Whether you’re making gifts, journals, or restoring old books, hand binding lets you leave a personal touch on every page.


